Billboard Mockups: Elevate Your Ad Presentations
Presenting a large-scale advertising concept on a standard computer screen can often feel underwhelming. Clients and stakeholders need to visualize how a design will actually look in the real world, not just as a flat digital file. This is where high-quality billboard mockups become an essential tool for designers, marketers, and business owners. These resources bridge the gap between abstract creativity and tangible reality, allowing you to showcase outdoor advertising designs with professional realism and impact.
A billboard mockup is essentially a pre-designed template that simulates a physical billboard structure within a digital environment. Instead of spending thousands of dollars on a photoshoot or relying on basic 3D rendering software that requires a steep learning curve, these templates provide a photorealistic stage for your artwork. The primary appeal lies in their ability to transform a two-dimensional graphic into a convincing three-dimensional scene instantly. For agencies pitching new campaigns or freelancers building portfolio pieces, this level of presentation can be the deciding factor in winning approval or securing new clients.
Why Realistic Presentation Matters for Outdoor Ads
Outdoor advertising exists in a specific environmental context. Lighting, perspective, and surrounding colors all influence how a viewer perceives a message. When you use professional billboard mockups, you are not just displaying a logo; you are demonstrating an understanding of spatial design. A flat JPEG cannot convey the texture of vinyl, the glow of backlighting at dusk, or the imposing scale of a highway sign. By utilizing 3D rendering techniques embedded within Photoshop files, these mockups replicate those physical attributes accurately.
This realism serves several practical purposes across different industries. For marketing teams, it validates whether color contrasts remain legible against varying sky conditions or urban backdrops. For educators teaching graphic design, it provides students with immediate feedback on how their work translates to large formats. Entrepreneurs launching local businesses can visualize their brand presence before committing to expensive lease agreements. In every case, the goal is to reduce uncertainty and build confidence in the visual strategy through accurate simulation.
Key Features That Streamline Your Workflow
Efficiency is just as important as aesthetics when managing tight deadlines. High-quality mockup resources are engineered to save time without sacrificing quality. When selecting a resource for your next project, look for specific technical features that ensure a smooth editing experience. The following specifications are standard for premium assets designed for professional use:
- Smart Object Integration: This is the core functionality that allows you to place your design in one click. It automatically warps, shadows, and blends your artwork to match the perspective of the billboard surface.
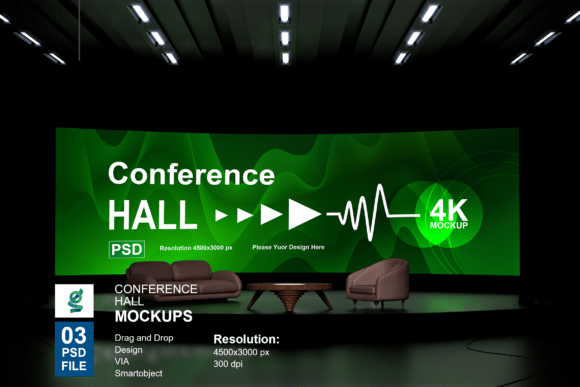
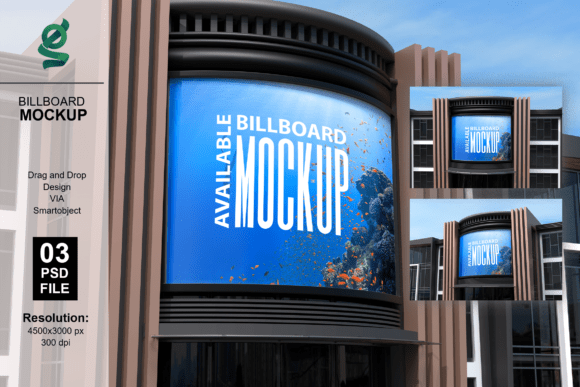
- High Resolution Output: Files typically offer dimensions of 4500x3000 pixels at 300 dpi. This ensures that even when zoomed in during a presentation or printed for a proposal, the image remains crisp and detailed.
- Customizable Environments: Versatile templates include adjustment layers for background colors and lighting. This allows you to match the mood of the mockup to the tone of your campaign, whether it is a bright daytime promotion or a moody evening announcement.
- Organized Layer Structure: Professional PSD files come with clearly labeled groups. This organization prevents confusion and makes it easy to toggle visibility or adjust specific elements without affecting the rest of the composition.
- Multiple Angles: Comprehensive packs often include three distinct Adobe Photoshop files, providing variety in perspective so you can choose the view that best highlights your specific design elements.
Practical Applications Across Creative Fields
The versatility of these tools extends far beyond traditional advertising agencies. Understanding where and how to apply them can unlock new opportunities for various professionals. Freelance graphic designers frequently use billboard mockups to enhance their portfolios. A portfolio filled only with flat logos can appear amateurish, whereas contextualized presentations demonstrate commercial readiness and attention to detail. This visual proof of competence helps attract higher-paying clients who value professional execution.
Small business owners and startups also benefit significantly. When pitching to investors or partners, showing a polished visualization of future marketing efforts suggests thorough planning and brand maturity. Instead of describing where ads might go, you can show exactly what they will look like. Similarly, event organizers and festival promoters use these visuals to sell sponsorship packages. Sponsors want to see the return on their investment, and a realistic rendering of their logo on a main stage banner or entrance sign makes the opportunity feel concrete and valuable.
In educational settings, instructors utilize these resources to teach the principles of environmental graphics. Students learn that designing for a billboard is different than designing for social media; text must be larger, contrast higher, and messaging simpler. Seeing their work applied to a realistic template helps reinforce these lessons more effectively than theoretical lectures alone. It creates a safe sandbox for experimentation before students enter the professional workforce.
Important Considerations Before You Begin
While these tools are powerful, there are important factors to keep in mind to ensure successful results. First, always verify the licensing terms. Some mockups are free for personal use but require a commercial license for client work. Respecting intellectual property protects both you and the original creator. Additionally, consider the aspect ratio of your design relative to the mockup. Billboards come in various standard sizes, and forcing a square design onto a wide panoramic template may result in unwanted cropping or distortion.
Lighting consistency is another crucial detail. If your design includes photographic elements with distinct light sources, ensure they align with the lighting direction in the mockup. Mismatched shadows can break the illusion of realism and make the composite look artificial. Most high-quality PSDs include adjustment layers specifically for matching light temperature and intensity, so take advantage of these features to create a cohesive final image.
Finally, remember that the model images and photographs included in these templates are strictly for presentation purposes. They serve as placeholders to demonstrate scale and human interaction but are generally not part of the editable smart object layer. If your campaign requires specific models or diverse representation, you may need to source separate stock photography or select a mockup that offers interchangeable human elements. Being aware of these distinctions upfront prevents frustration during the editing process and ensures your final presentation meets professional standards.
How to Edit Your Billboard Mockup in Minutes
One of the greatest advantages of modern PSD templates is their accessibility to users of all skill levels. You do not need advanced retouching skills to achieve professional results. The workflow is standardized across most high-quality assets, making it easy to switch between different templates as needed. Follow this simple process to update your presentation:
- Open the File: Launch the Adobe Photoshop application and open the desired PSD file from your downloaded package.
- Locate the Smart Layer: Navigate through the organized layers panel to find the layer marked "Smart Object" or "Place Your Design Here." Double-click the thumbnail icon on this specific layer.
- Insert Your Artwork: A new document tab will open containing the placeholder image. Delete or hide the placeholder, then paste or drag your own high-resolution design into this space.
- Save and Update: Press Ctrl+S (Windows) or Cmd+S (Mac) to save the smart layer tab, then close it. Return to the main mockup file to see your design automatically updated with all perspective, shadows, and textures applied.
This non-destructive editing method means you can swap designs endlessly without ever altering the original template. If you need to present multiple variations to a client, simply duplicate the smart object layer or create copies of the PSD file. This flexibility encourages iteration and refinement, ultimately leading to stronger creative outcomes. By integrating these efficient workflows into your practice, you elevate the perceived value of your work while reducing the time spent on technical setup.